Validator Staking Guide
Step 1 - Go to validator page
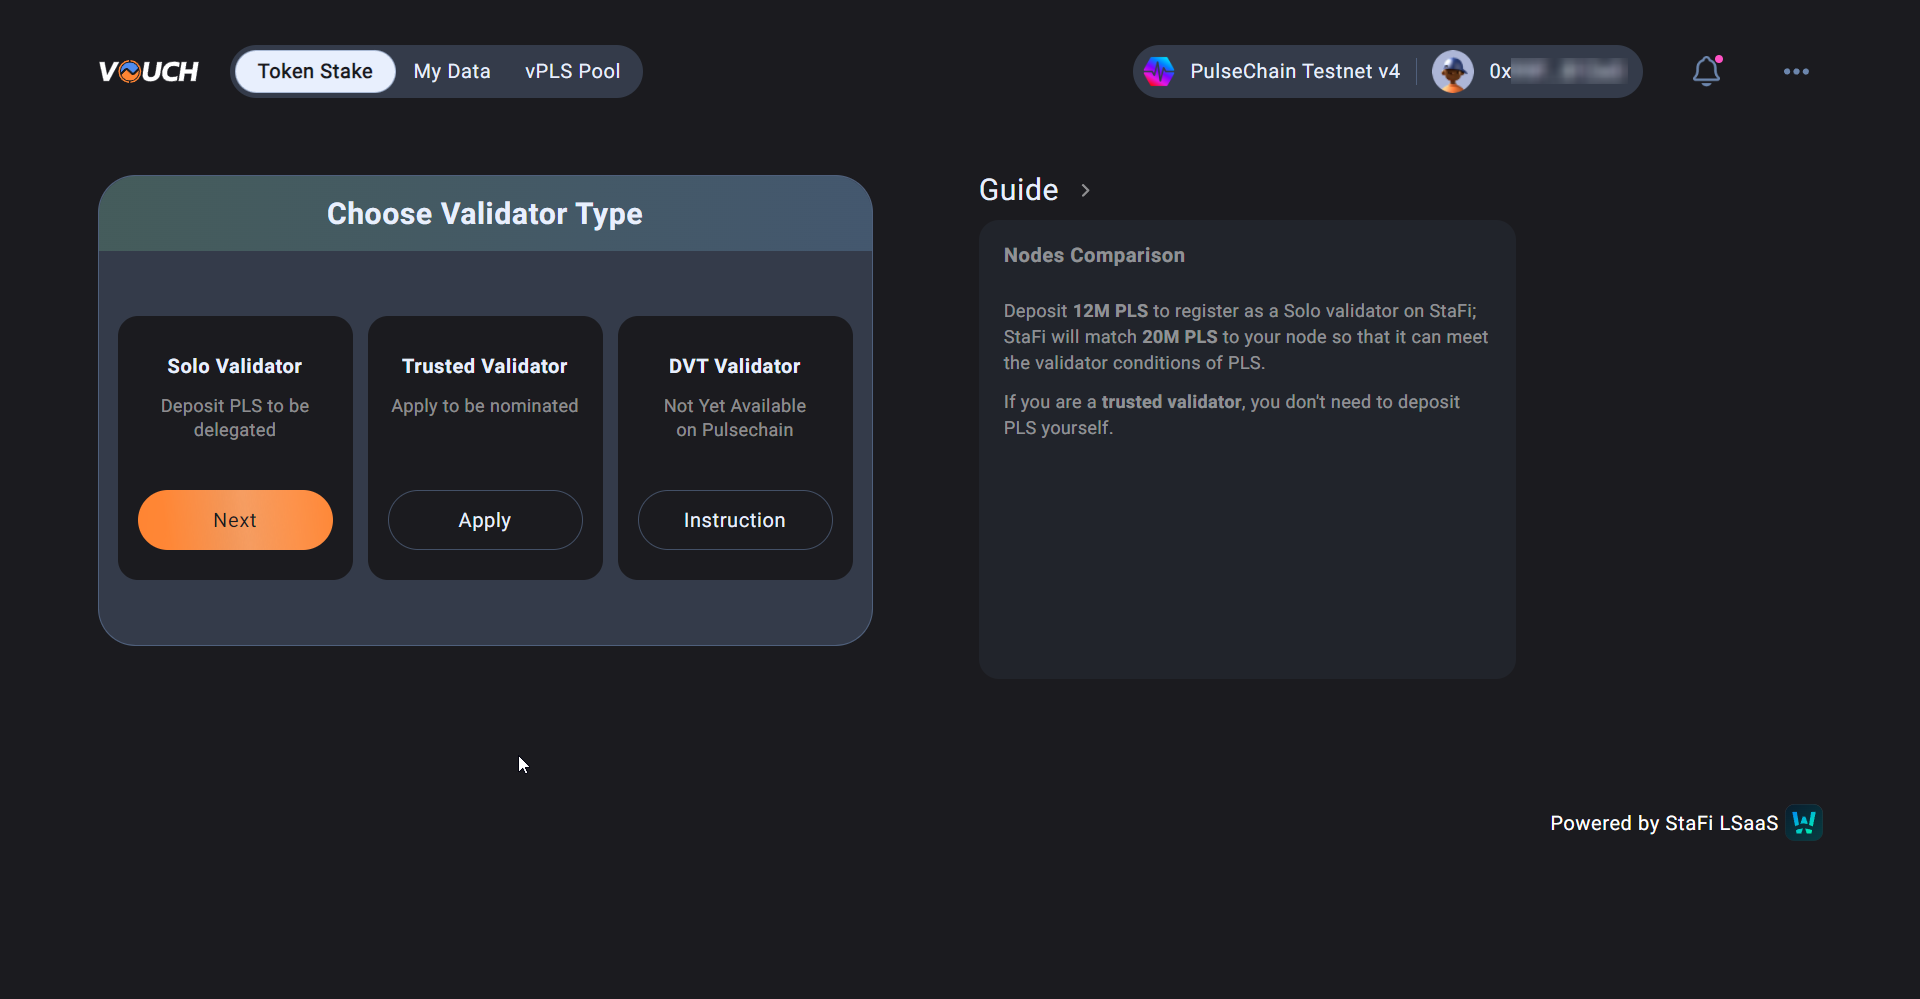
Go to the Vouch validator staking validator page by selecting New Deposit from the Token Stake page

Connect your wallet and select solo validator by clicking the Next.
Step 2 - Upload deposit file
You will need a deposit_data file, this is created when you generate your validator keys using the pulse-staking-deposit-cli tool.
Vouch have created a useful vouch-validator-tools GUI tool for generating your keys and associated deposit and staking files. Using this tool guides you through producing the required files, or you can take the more traditaional hands on approach if you need more control.
Option 1: Guided GUI approach
Clone the tools to your home directory
cd $HOME && sudo apt update && sudo apt install git && git clone https://github.com/Vouchrun/vouch-val-tools.gitRun the tools GUI menu
cd $HOME/vouch-val-tools && find "$HOME/vouch-val-tools" -type f -name "*.sh" -exec chmod +x {} \; && ./vouch-menu.shFollow the onscreen Prompts
Option 2: Traditional staking-deposit-cli approach
Use these instructions to generate your keys and files.
Regardless of the option you choose above, when you generate your keys using the pulse-staking-deposit-cli tool, you will create two files
deposit_data-*.json and staking_data-*.json In this step you are using the deposit_data-*.json file. In following steps we will use the staking_data-*.json file.
Generate your Validator Keys and corresponding deposit and staking files before proceeding.
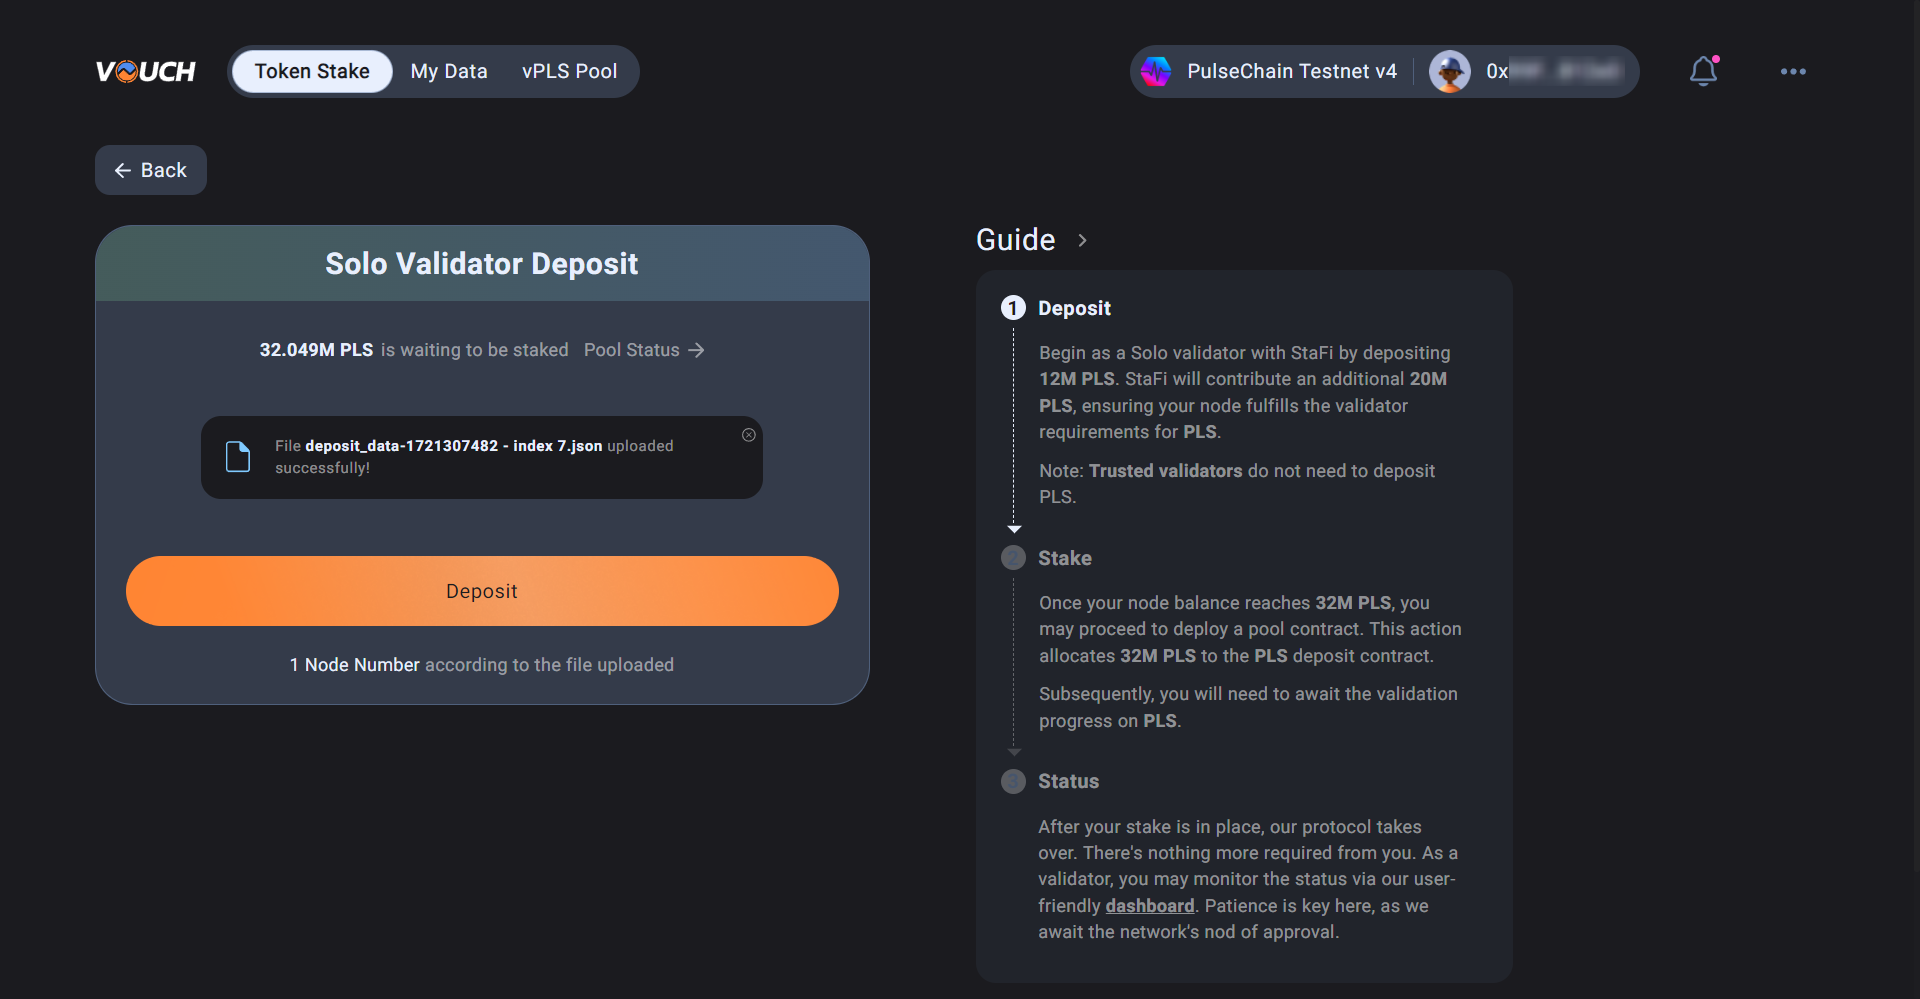
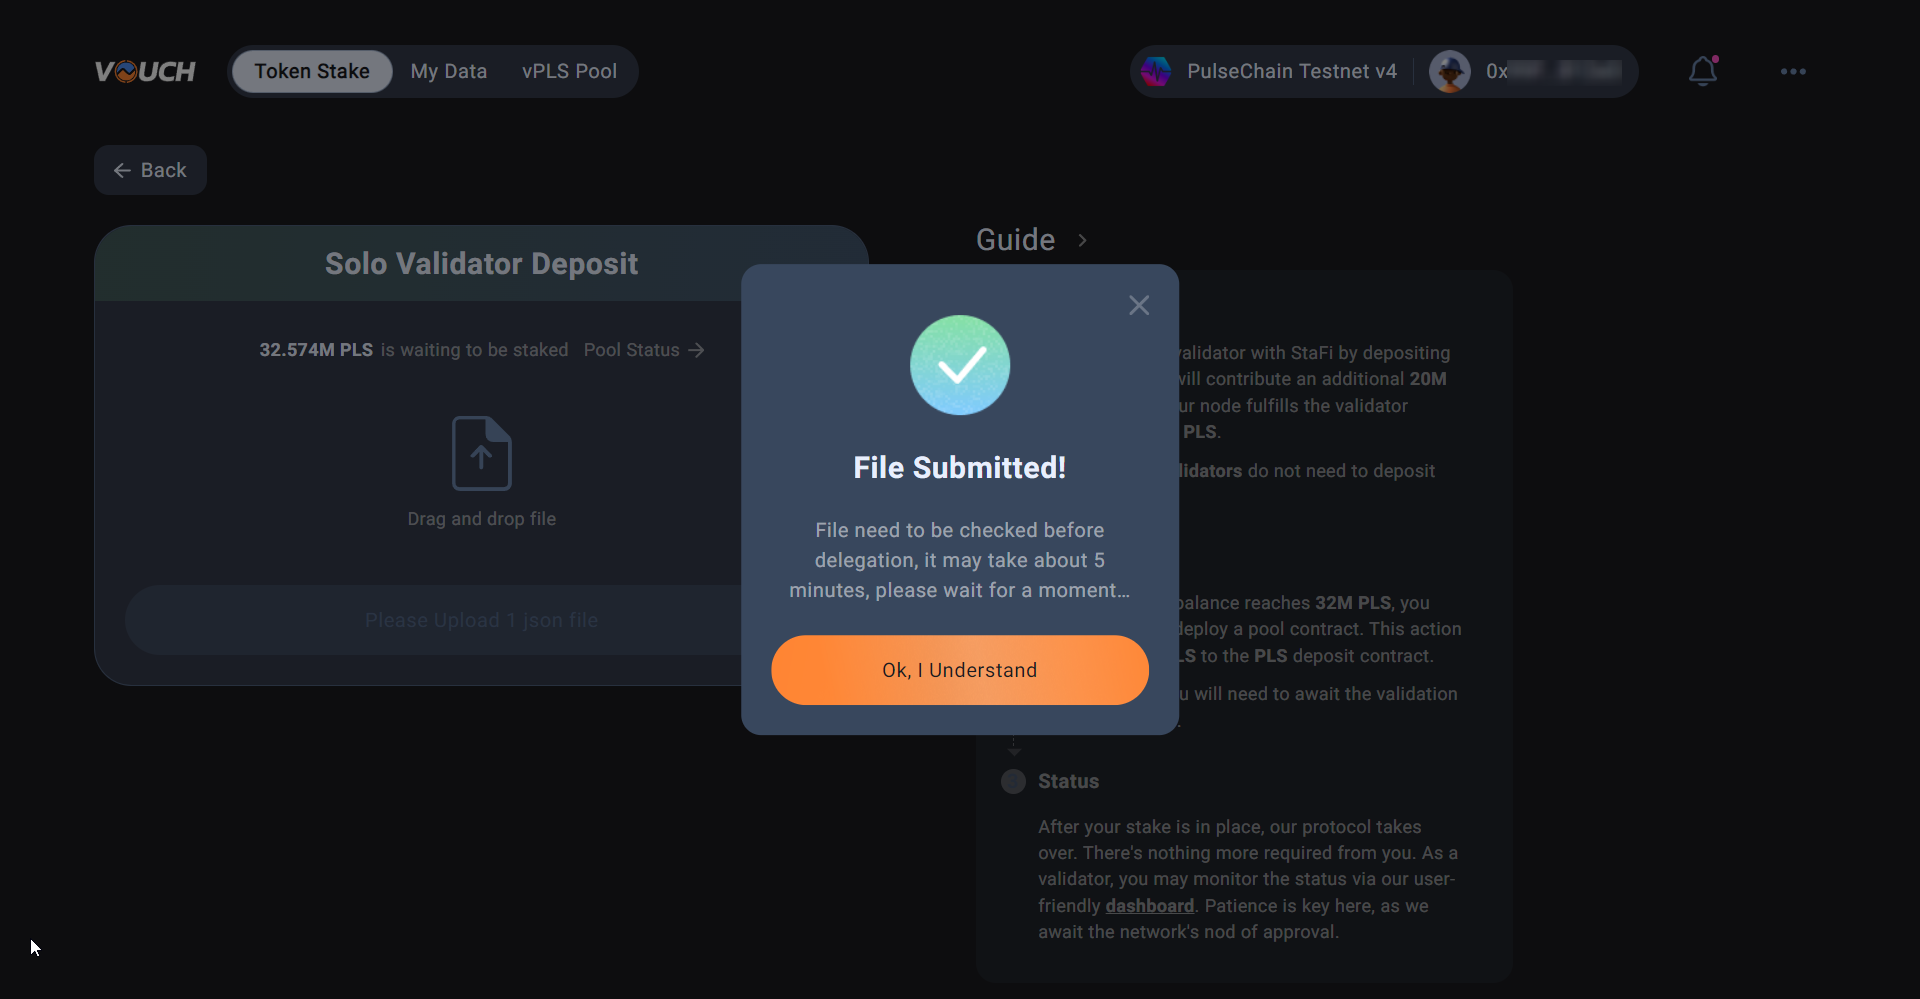
On the “Deposit” page, upload the deposit file(deposit_data-*.json) obtained above, you will see “File uploaded successfully ” if you have done this correctly.
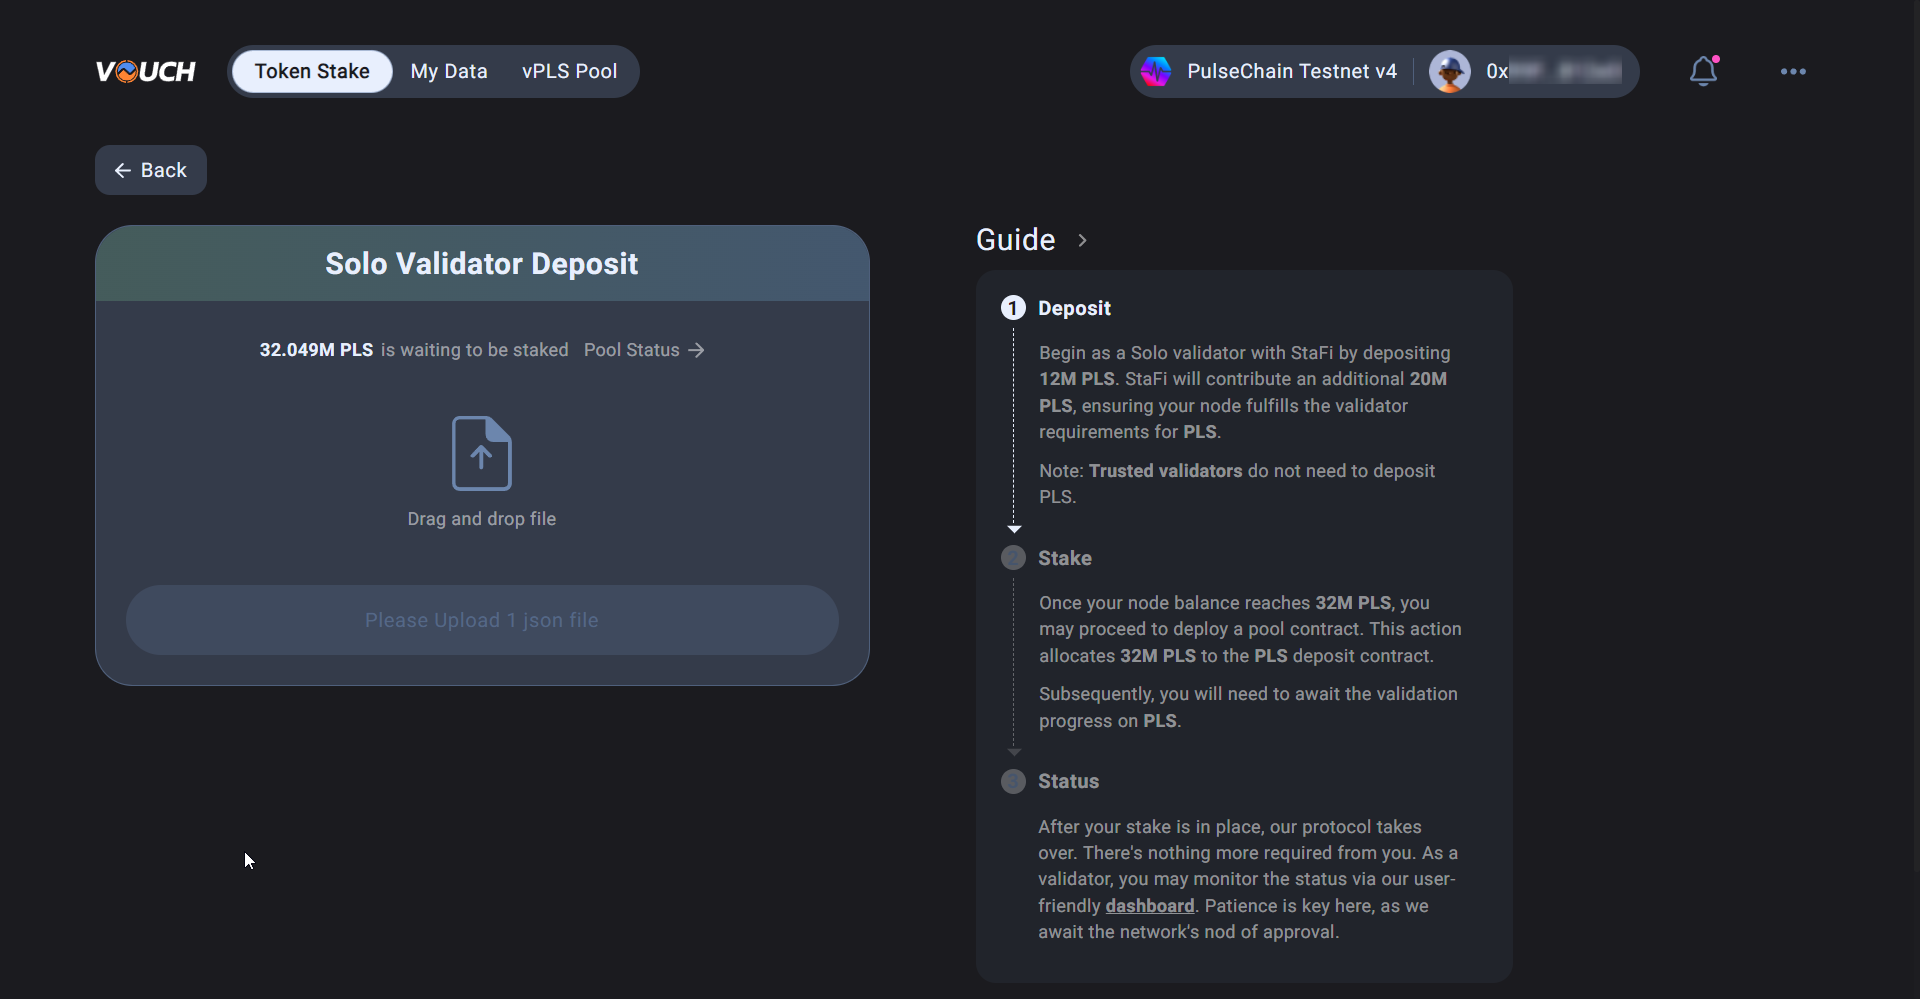
Upload Succesful...

Step 3 - Deposit PLS
The connected address, will be known as your node address in the user interface (UI). Make sure you are deposting your PLS from the address you intend to be assocated with your validators in the UI.
Click Deposit (Please make sure you have enough PLS in your connected address), You will be required to deposit 12Mil per validator as detailed in your deposit_data file. The checking process may take 5 minutes, please wait a moment.
Approve the deposit transation...
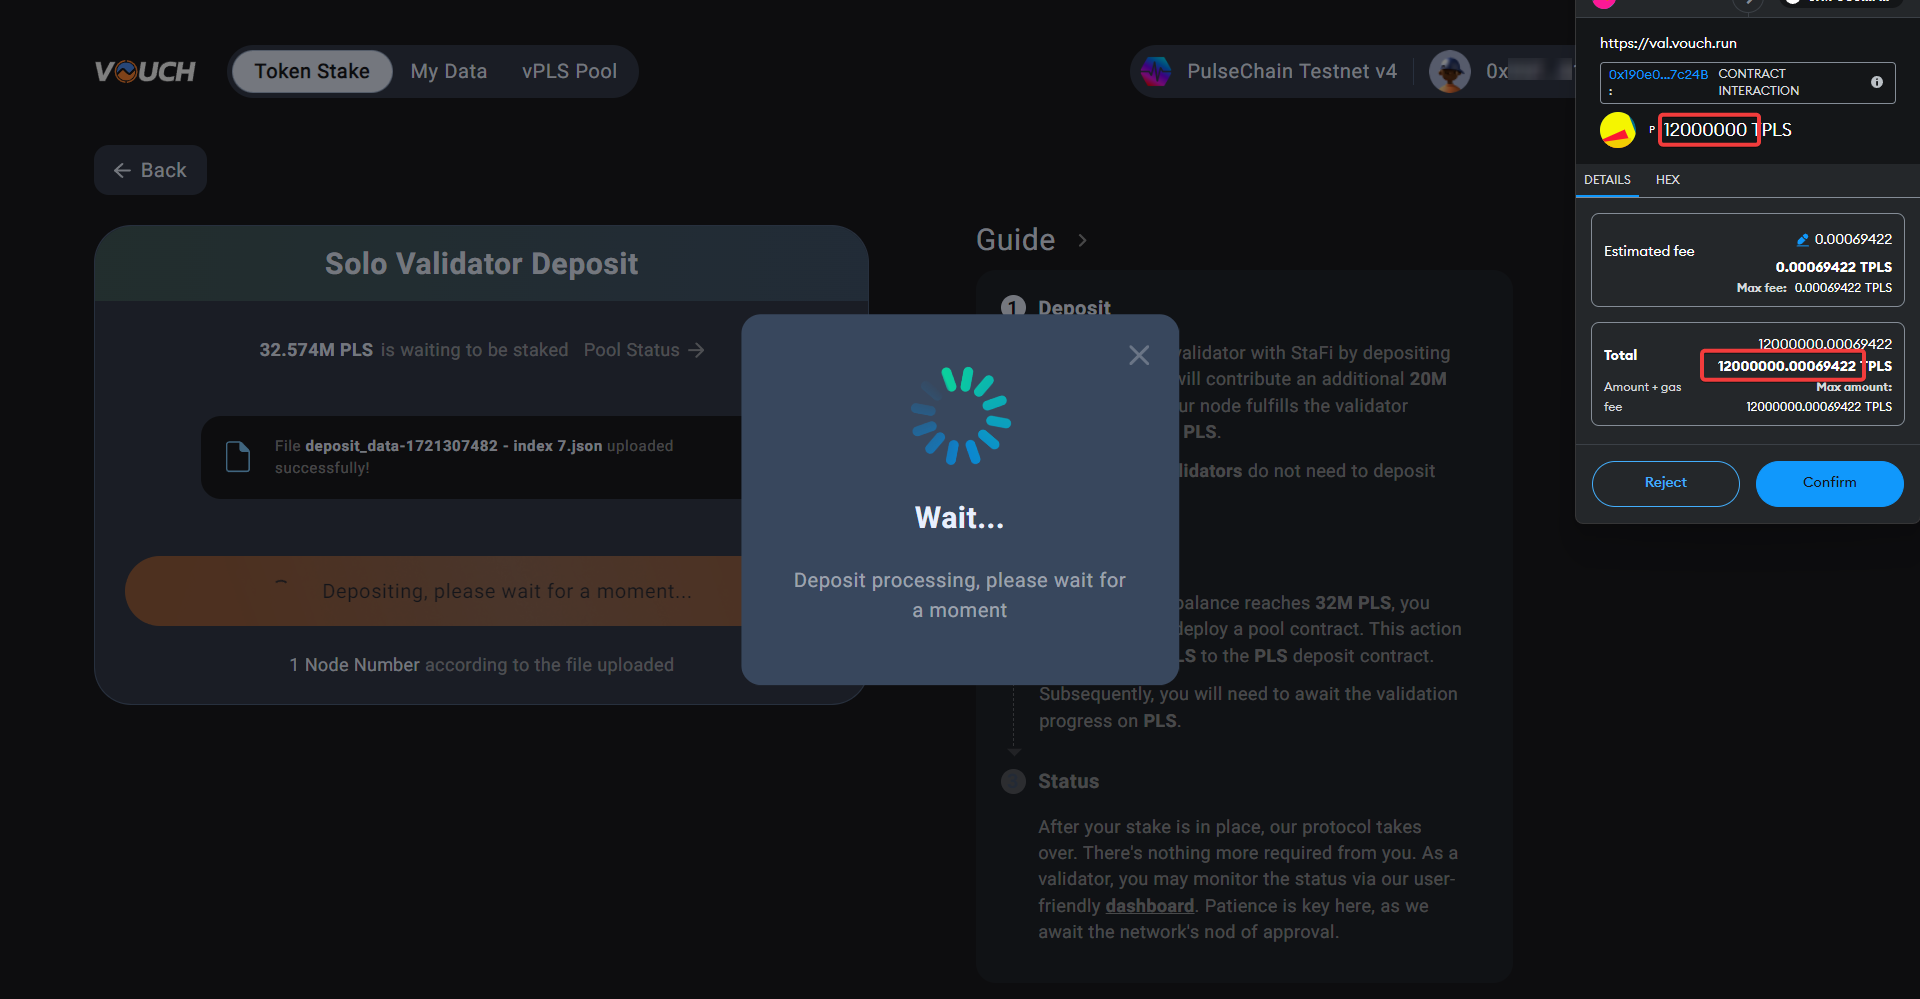
Wait for deposit to be approved...
Step 4 - Staking Validators
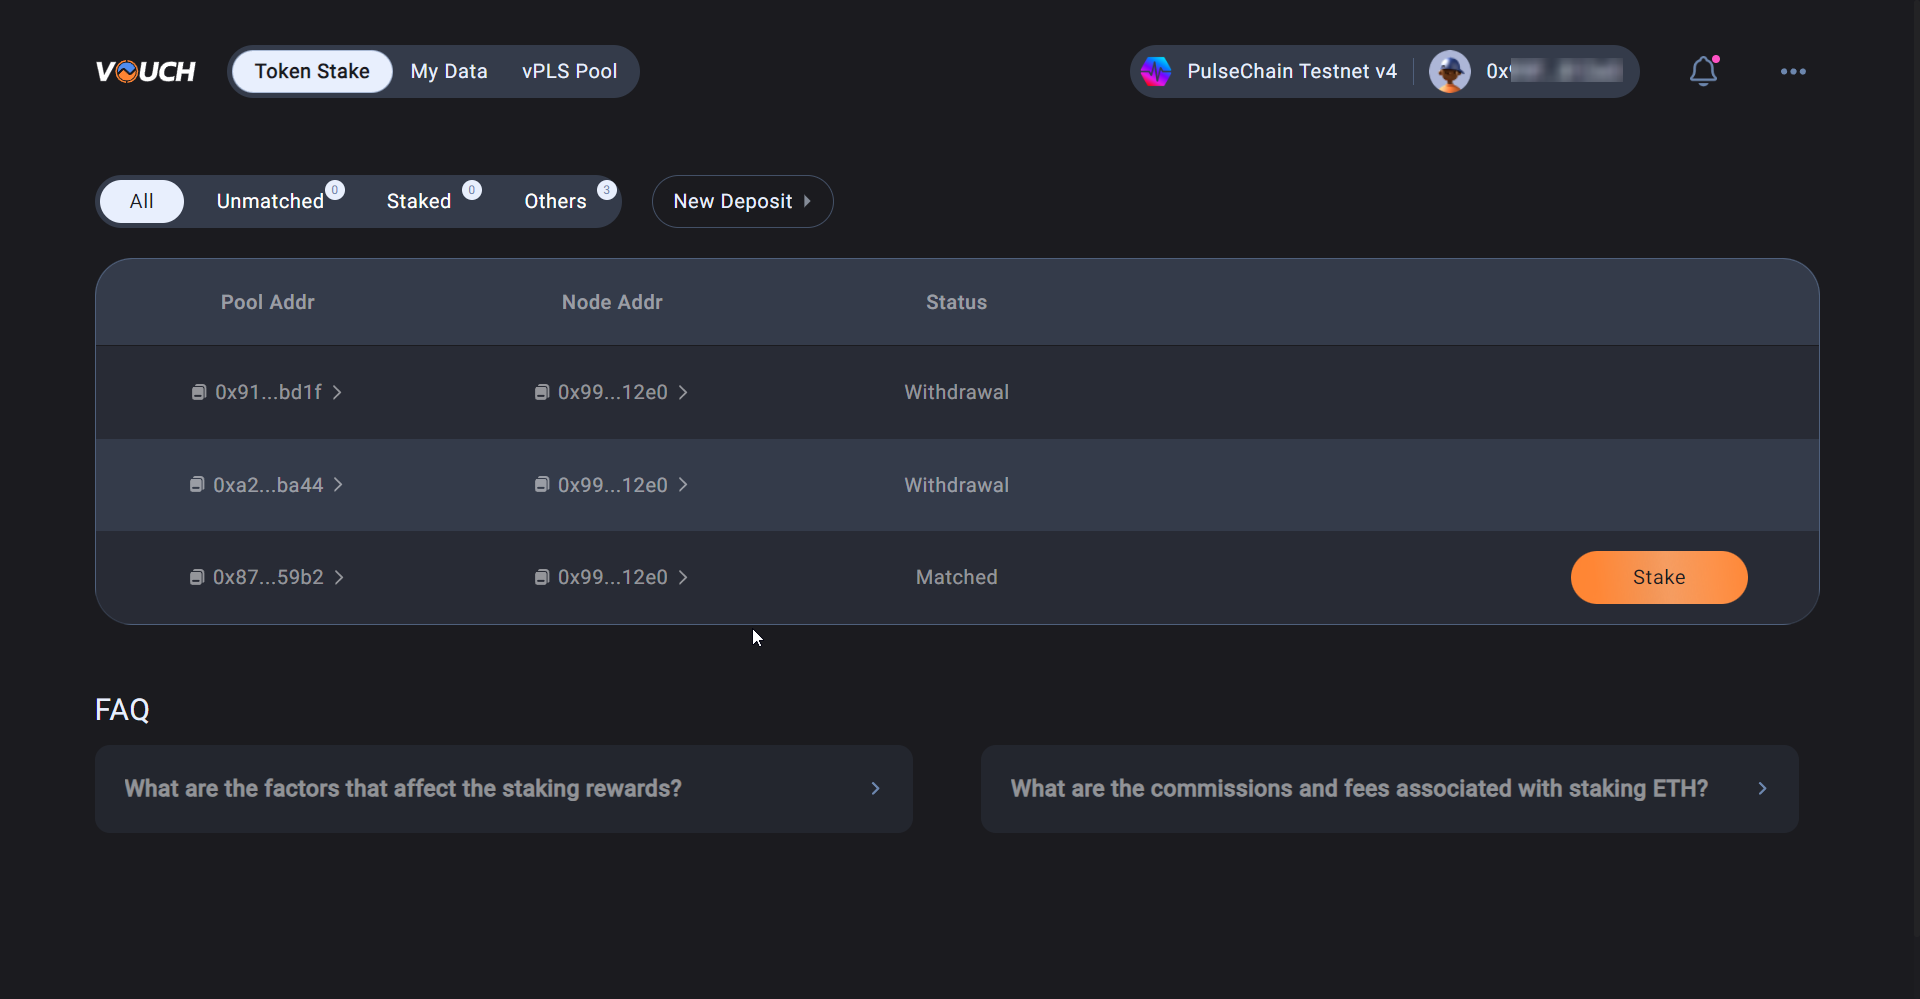
After you click on Ok, I Understand you will be returned to the Token Stake page. Here you will see a list of your Validators and any that have been Matched with PLS from the User Pool.
Your self-deposited 12Mil PLS has matched 20Mil PLS in the pool, click Stake to continue and stake 32Mil PLS on the Offical Pulsechain Staking Contract.
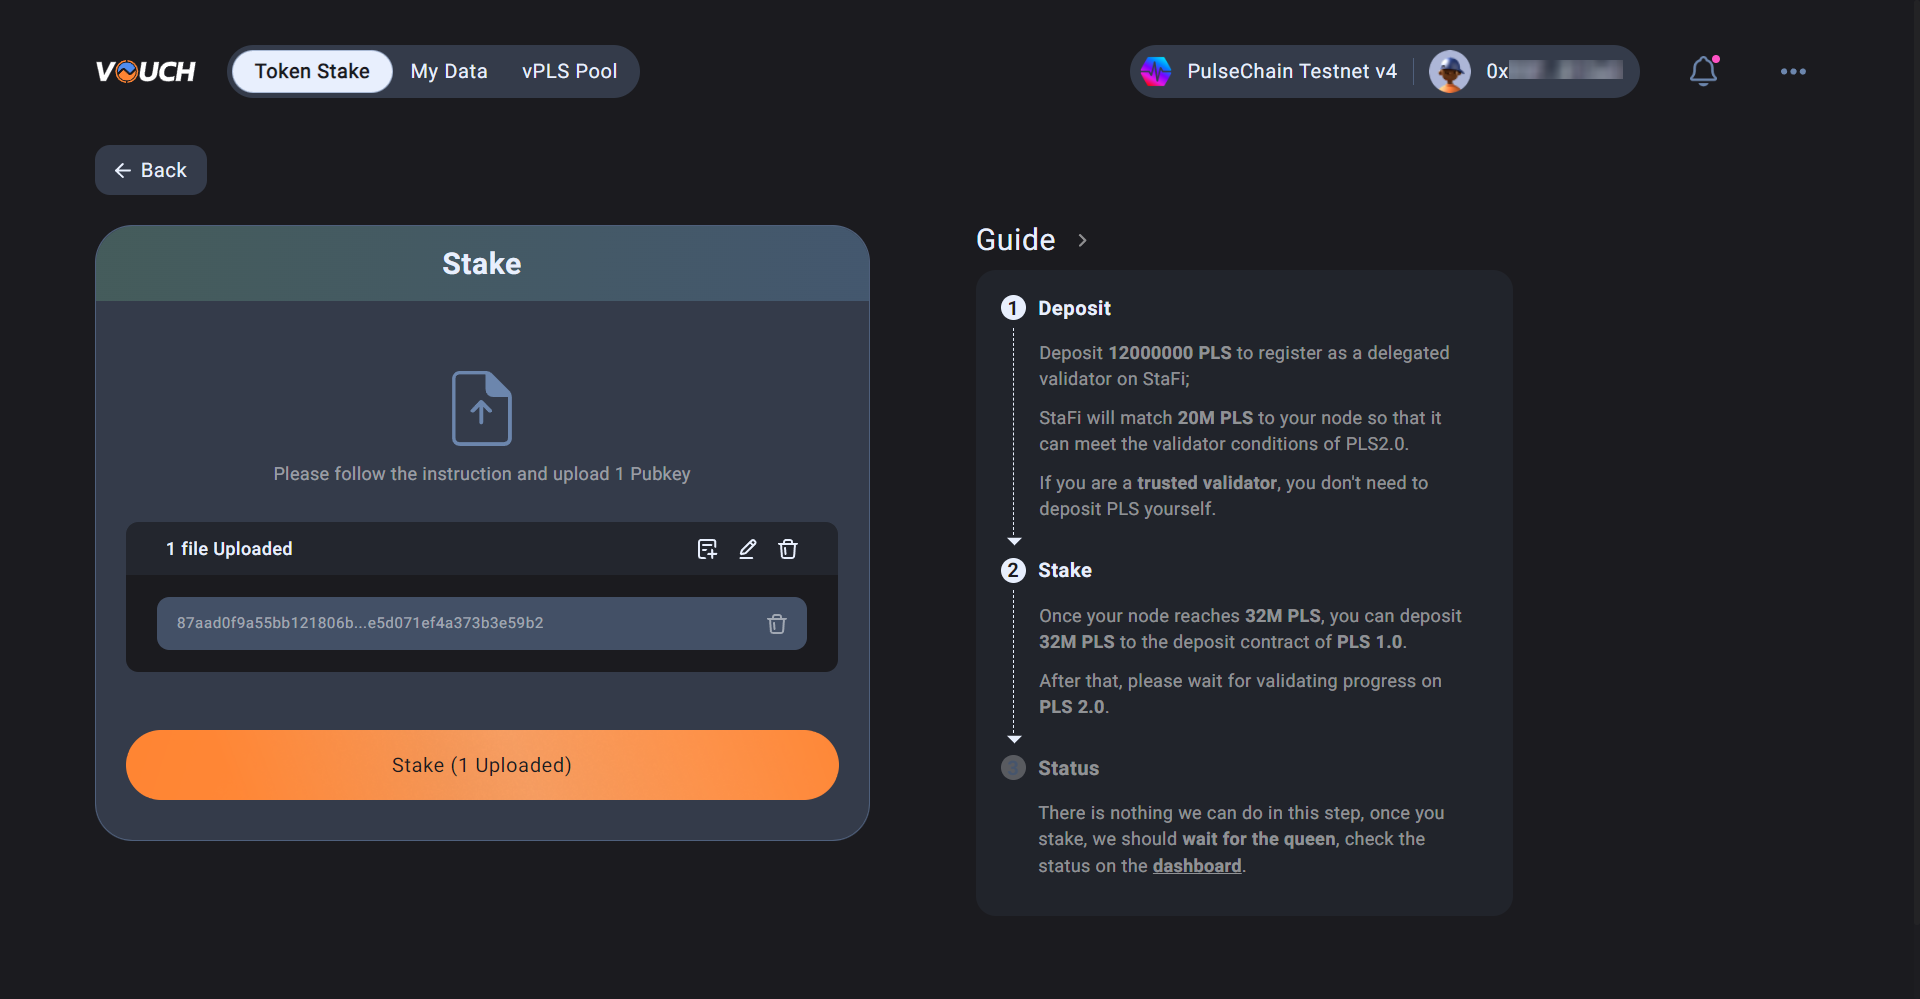
Step 5 - Upload the Staking Data File
Upload the stake file stake_data-*.json created in step 1.
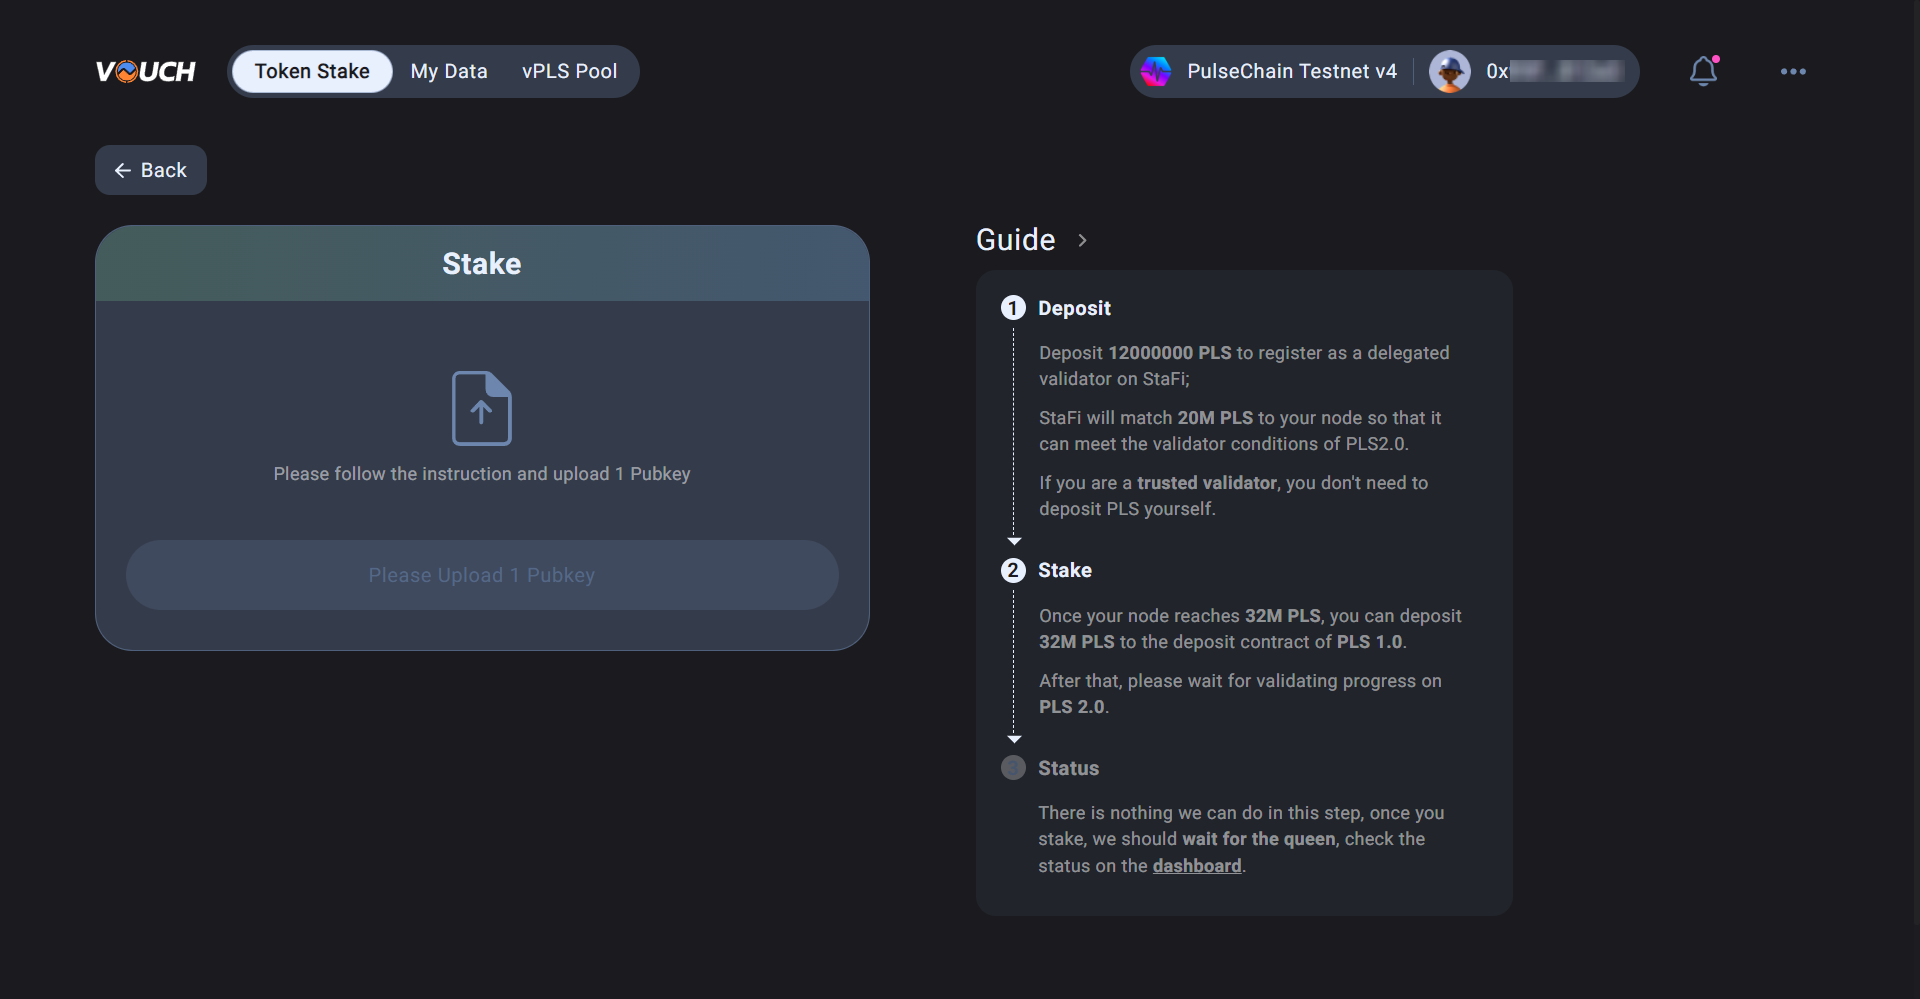
Confirm the file has been uploaded correctly then click on the Stake button
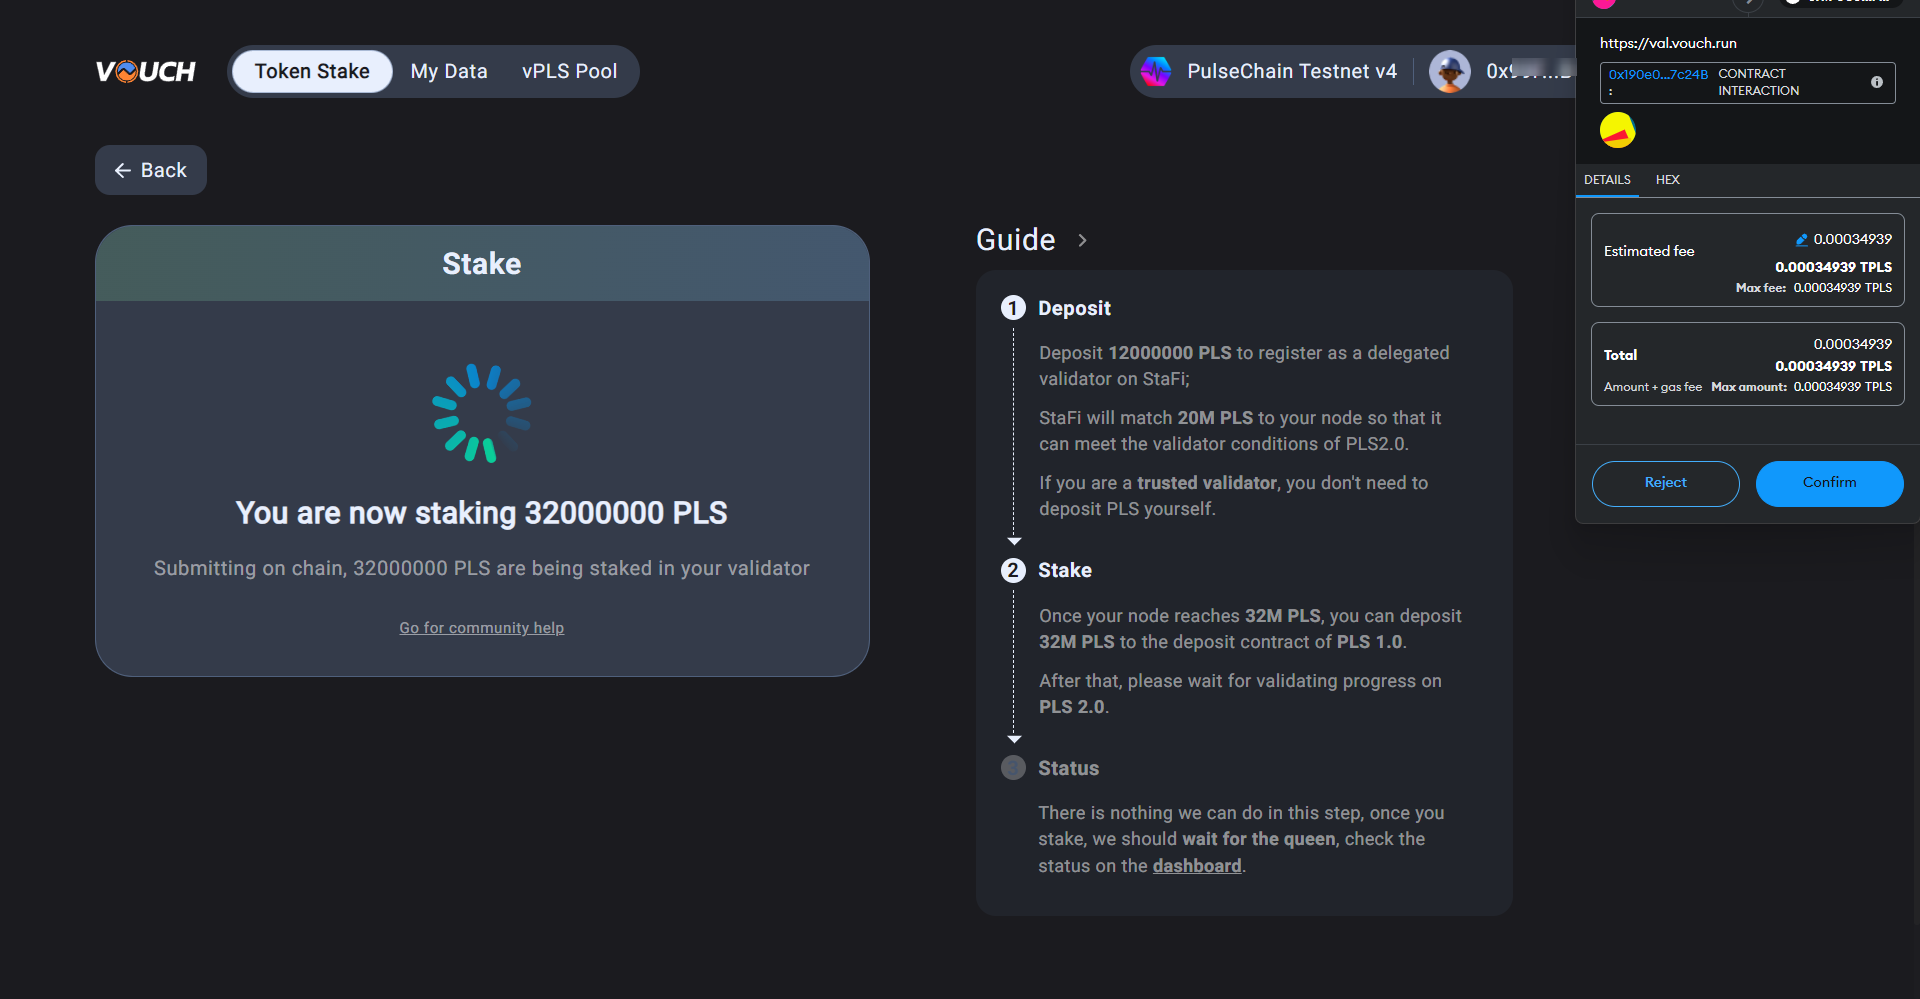
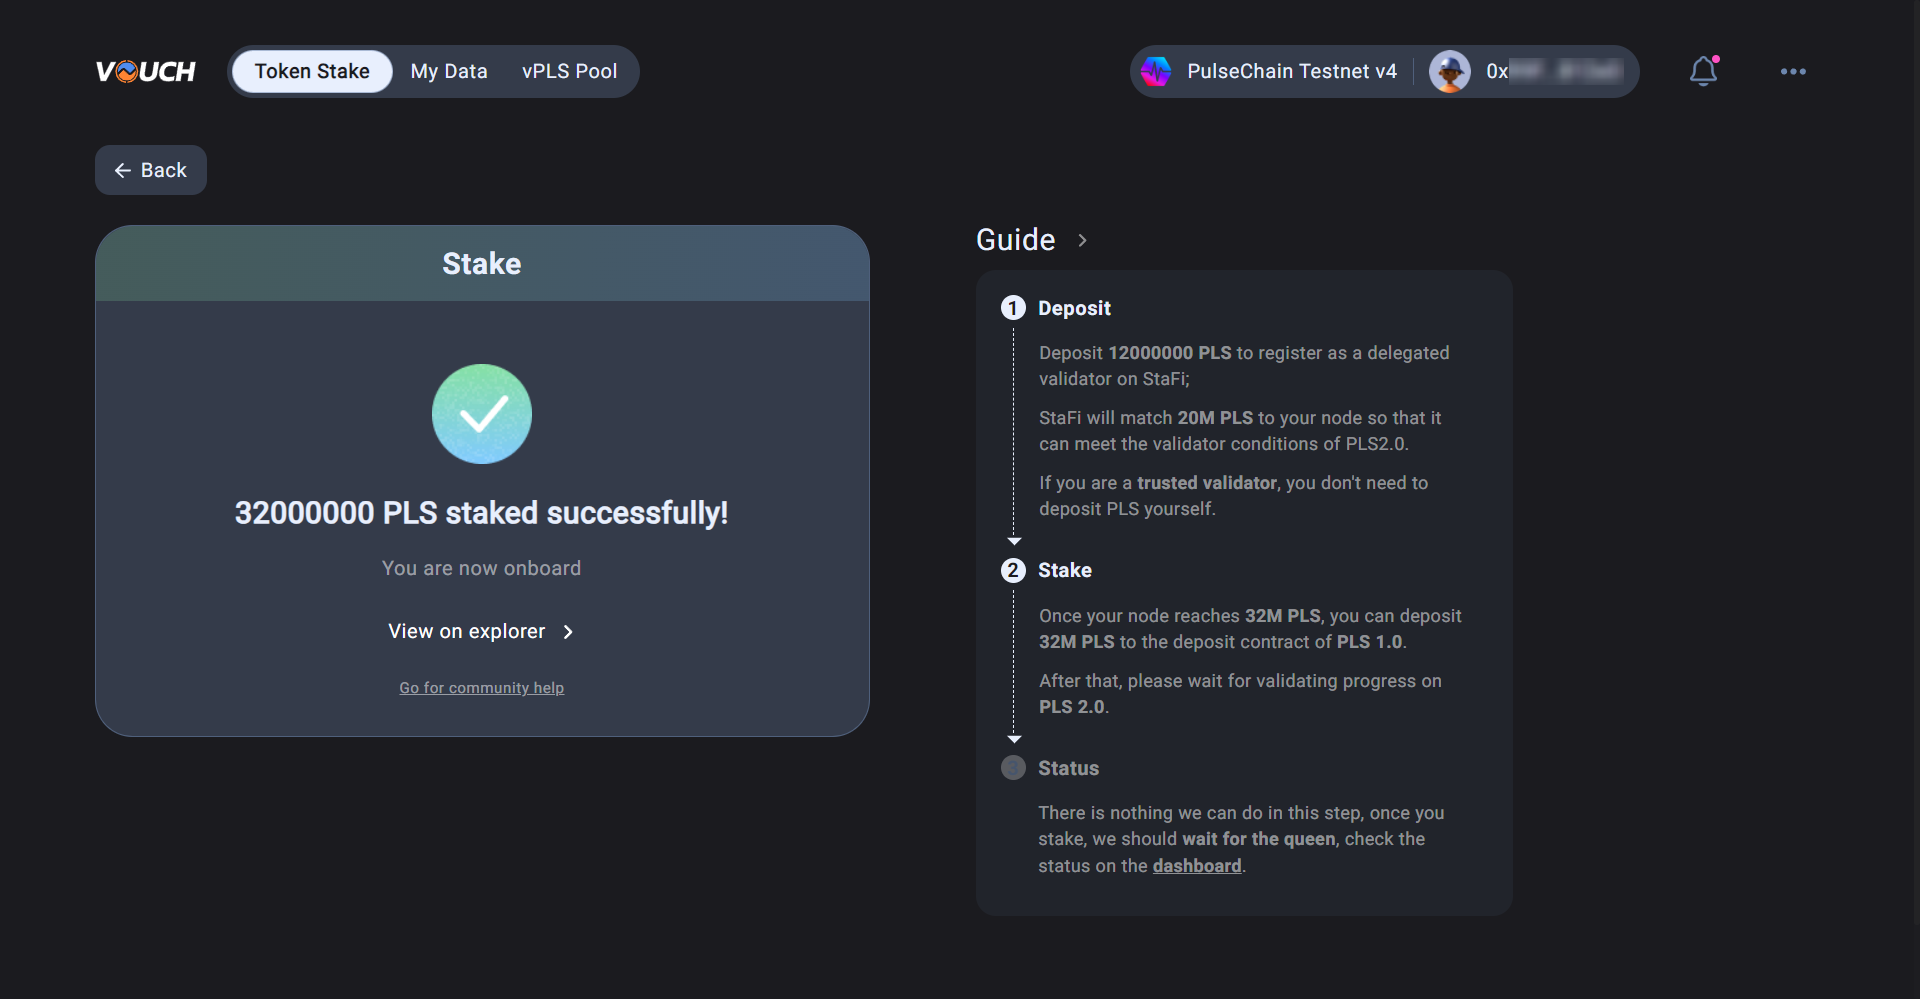
Approve the Stake transaction to commit the 32 Mil PLS requried to the Offical Pulsechain Staking Contract.
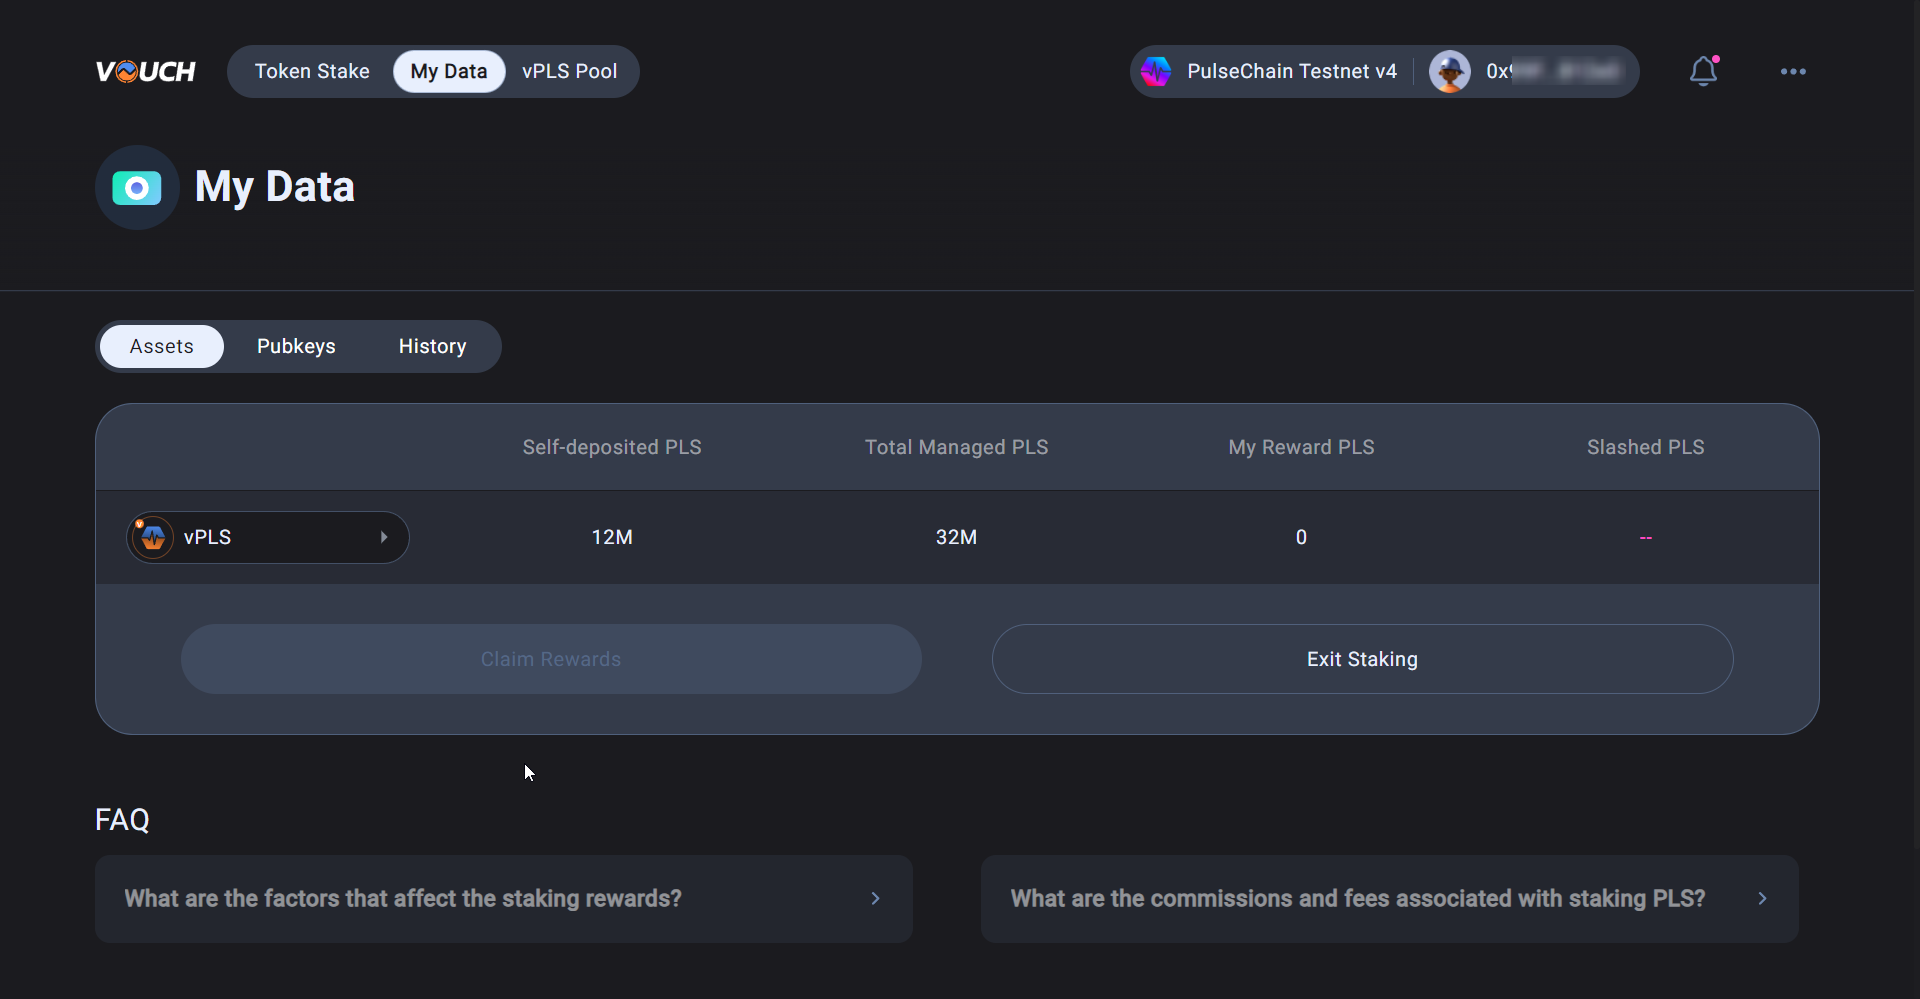
Step 6 - Check data
You can check your Managed PLS and Public key List Rewards on My Data page and check the pool data in the Pool Data page after 32 PLS staked successfully i.e Active. While the validator is in a pending state the values may not reflect the updated amounts.
WARNING
You still need to activate your validator client with the corresponding validator_keys on your validator hardware as per normal. If you fail to do this you will start losing rewards and get penalised.
🤓 Possible Reasons for staking failure
- The uploaded file is invalid.
- Insufficient PLS in the pool:
- For Solo Validator: PLS amount in the pool < 20Mil Pubkey amount.
- For Trusted Validator: PLS amount in the pool < 31Mil Pubkey amount.
- The pubkey of the Trusted Validator can not be uploaded for the solo Validator.
- Trusted Validator and Solo Validator pubkeys could not be staked at the same time.
Step 7 - Run a Vouch Ejector Client ⚠️ important
The Ejector service plays an important role in Vouch LSD stack. Every validator should run an ejector service to properly handle the validator exiting process, as users are free to unstake vPLS and withdraw their PLS.
Make sure you are running an Ejector Client on your Validator Node
Instructions for installing and running an Ejector Client can be found here.